WHEW! This was a whopper of a project. I got a little excited about this week's Project Run and Play on my sewing forum. The subject was "Colorful Couture". After looking up "couture" to be sure that my idea was actually what is was (hey,
America's Next Top Model only teaches so much), I pulled out a piece of paper and started jotting down ideas. I wanted this dress to be flippin' outrageous.
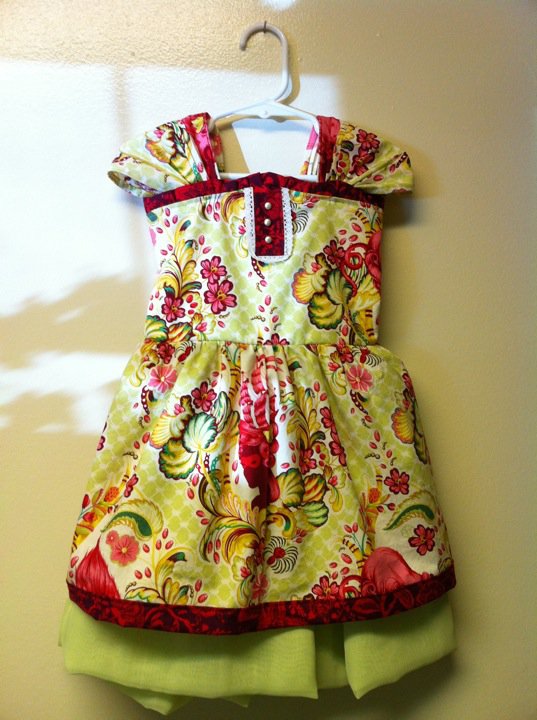
Here is the back (my favorite part):
And the front:
The sleeves are also convertible from pleated straps to half-pleated cap sleeves:
Hand-painted antiqued eyelets-
Another option with the dress is the removable chiffon inner skirt (tutorial very soon!):
The dress can be worn with or without the chiffon inner skirt. The skirt can also be worn with a separate shirt on its own.
Without further ado, the tutorial for the main corset dress.
I like to put warnings on my tutorials, kind of a "head's up". I am new to sewing (been sewing for about 3 months or so now), so I don't always have the sewing jargon down and a lot of my stuff is just eyeballing or guesstimating. I wrote down my measurements and can tell you exactly how I made THIS dress, what I would change, etc. I suggest reading through the entire tutorial before committing. If you have a better way of doing it, by all means, go for it! Like I said, I'm new and I make stuff up on the fly.
Supplies for dress WITHOUT chiffon underskirt (yardage is applicable for size 2T dress. Adjust accordingly for your sizing needs.)
1 yard main material (they gave me an extra 2" on my "yard", so you may want to get 1 1/4 yd instead)
1/2 yard of material for trim
1/2 yard of material for lining
Large eyelets and Eyelet pliers
*Paint for eyelets if you want to customize them
*Clear, non-toxic matte finishing spray to seal (I used Krylon Matte finish... love that stuff.)
Ribbon for corset back
No-fray so ribbon won't get ugly. (I use a heat sealer. Heat sealer, clear nail polish, or no-fray works fine.)
Matching thread for both main fabric and trim.
Disappearing ink marker for fabric
Buttons
Lace (about a foot)
Lightweight interfacing
Pattern paper or pattern fabric
Acrylic ruler
Rotary cutter
Step 1- Take your measurements. You'll want to take a few. Mine are in the parentheses.
Measurement A- Around the chest and back, right up under the armpits. (20" I wrote mine at the bottom in the picture b/c I didn't want to scribble over my other measurements.)
B- From armpit down torso to where you want the bodice to end (6")
C- How far you want the arc to span across the chest (4.5")
D- How high you want the arc to rise (0.5")
If you just want your bodice to be straight across with no arc, skip "C" and "D".
Draw out your bodice again so you can visualize your pattern. I wanted to add a 1/2" seam allowance all the way around the edge, so I drew that in with a dotted line. I would also add 1" or 1.5" to measurement A when you are making your pattern. My dress fits without squeezing, but I really wish I'd made the bodice a bit looser so she could wear it longer. As it is, I put it on her from the bottom, sliding it up. It's snug, but she's going to outgrow it FAST.
Step 2- Draw out your pattern. Using your pattern paper, acrylic ruler, and a pen or pencil, draw out your pattern. I opted to draw the bodice piece in half and cut it on the fold so I'd use up less paper and have less room for "oh poop" measuring mistakes. KEEP your seam allowances in mind. First, I drew a rectangle that was Measurement A (remember, you should add 0.5"- 0.75" [remember the extra 1- 1.5" I talked about in Step 1, you're cutting that in half b/c your pattern is half] extra inches for growing room so you'll get more enjoyment out of your dress) and added a 1/2" seam allowance to the end. Then I put a mark where I wanted my arc to peak (Measurement D) and marked 1/2 of C from the fold. I used a paint can to draw the arc. Okay, I'm a visual person. Here's what my pattern piece looked like.

I'm telling you, I hate math and was able to do it. It looks scary, but it's easy. I then cut the right edge of my pattern to allow for the corset room. I cut about halfway up and 1/2" in. You can see it in the next step.
Step 3- Using your customized pattern piece, cut out one of your main fabric and one of your liner. Remember to cut on the fold (fold on left in the next pic) so when you open it up, you've got an entire bodice piece.
 |
| Note the right edge where I cut a little bit out for the corset. Didn't measure, just cut a small bit. |
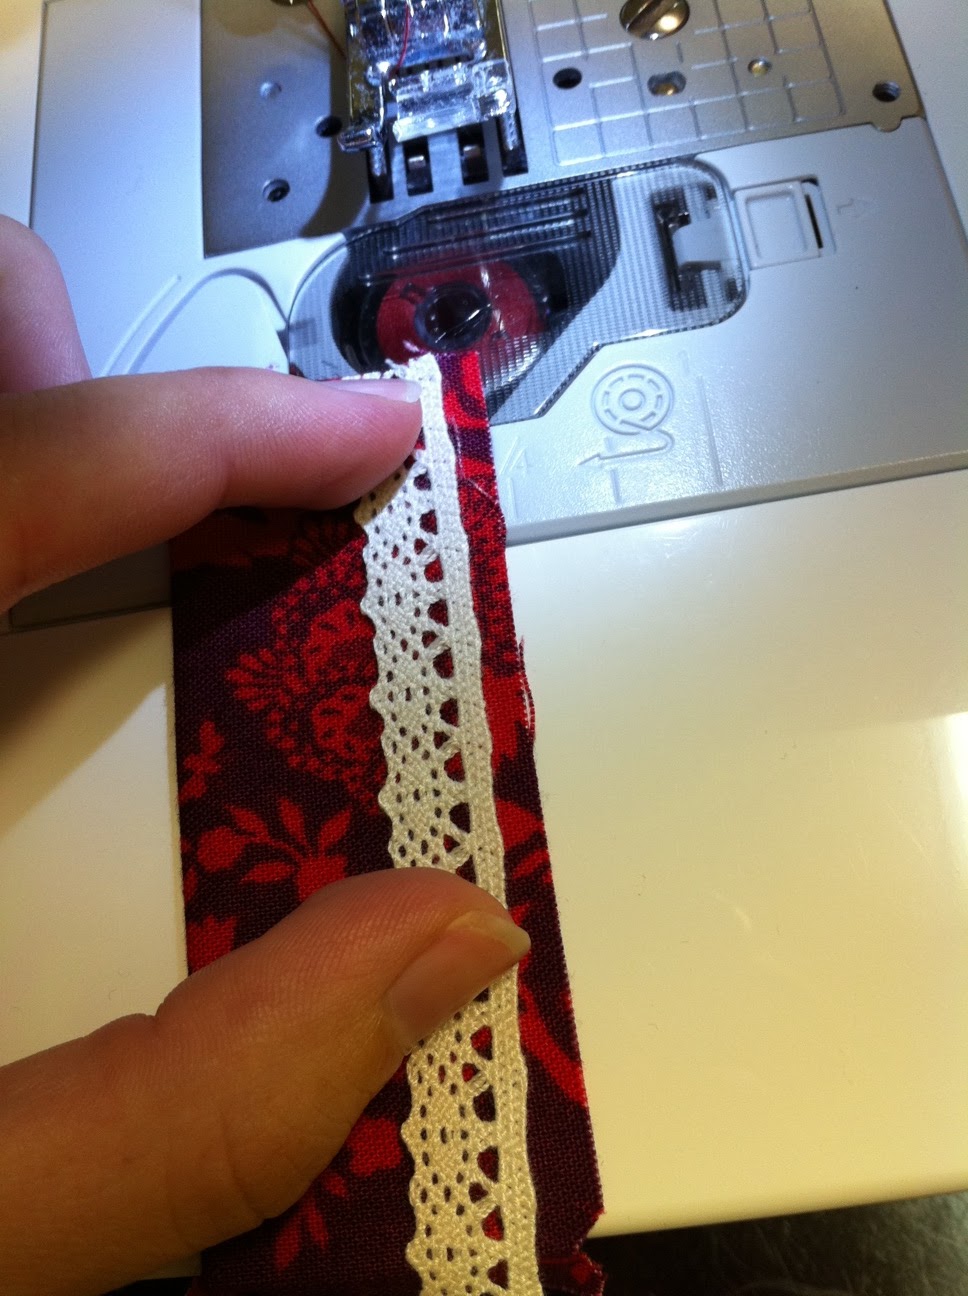
Step 4- Cut out a 1.5" x 3/5" piece of your trim material. With right side down on ironing board, fold back both long sides and one short side (bottom) 1/4" and press. This crease will help you position your lace. Now, put your lace on top of the crease and sew, folding and mitering at the corners. Sew down one long side, the bottom, and then up the other side. No need to finish the last side, as that will be covered up with liner and ruffle soon.
Step 5- Center lace trim piece on bodice, lining up raw edges and flipping creases under. (You may have to press again, but be careful with your lace. Don't burn it!!!) Pin in place and sew as close to the edge as possible.
Now, measure 1/2" down (Remember, that's going to be seam allowance). Measure remaining and divide it by how many buttons you have. Or, just eyeball the button placement and go for it. :) Sew 'em on!
Step 6- Cut a strip that is 2" wide and 1.5 times measurement A. Right sides together, press and sew both of the short ends.
 |
| After pressing, sew down each of the short ends. |
Now, flip it right side out. Press again.
Run a gathering stitch 1/4" from the raw edge. Gather and pin to the top of the bodice, be sure to spread the gathers evenly.
Baste 1/4" from raw edge.
Step 7- Lay lining piece on top of main piece, right sides together with ruffle sandwiched in the middle. Pin and stitch 1/2" from raw edge. Zigzag or overlock stitch the raw edges. (I forgot to do that at this point and had to do it later. Grr...)
Flip right side out and press... being careful with the buttons and lace.
Step 8- Flip over and hold the short part of the lining piece right sides together. Pin and sew ONLY the short side (1/2" seam), do not sew up the cut-out corset part. Press open seam. Repeat with short side of main fabric.
Step 9- As I said, I'm new to sewing and maybe there's an easier way to do this, but I just cut out pieces of interfacing (This is only one, I cut four. Two like this, two mirror images), and fused them to either side of the main fabric and the lining. Follow the manufacturer's instructions for fusing. I recommend making it a little bit (1/2" or so) wider for easier eyelet insertion. This worked for me, but it was tight.
Step 10- Now is a good time to start painting and sealing your eyelets if you want them to have that "antique" look. This was my first time working with eyelets, so I didn't realize they had two parts. (I know, I know. Duh, me.) Be sure to paint BOTH sides. I used antiquing paint that I found at Wal-Mart. Waited for it to dry, then applied the sealer and waited for it to cure. Apply the sealer in a well-ventilated area. Outside is great, just watch where the wind is blowing.
Step 11- Using your trim material, cut a strip of bias 2" wide and long enough to go around the edge of your corset piece AND have room to fold the short edges in 1/2". Fold and press the short edges in 1/2", then fold and press the bias tape in half, wrong sides together. Open it back up, and fold the raw edges towards the middle fold.
Now, you're ready to pin it to you bodice piece. Pin the bias tape to the bodice piece and lining, making sure that the main bodice piece and lining's seams are matched. Sew just a TAD less than 1/2" in from raw edge.
Flip the bias tape over, making sure to cover the line of stitching you just made. Pin in place and stitch close to the edge... securing it at the start and finish by backtacking.
Step 12- Time for sleeves! If you want to go easy and just do straps, that's perfectly awesome! However, if you want to go all crazy and make convertible sleeves, get ready...
I had two scraps of fabric that were 8" x 9.75". Looking back, I wish I had used larger scraps so I could have turned the raw edges under instead of just overlock stitching them. I would cut two pieces that are 8" x 11" at LEAST and work with that... you can always take material away. :)
I did these sleeves by just eyeballing. Don't be afraid to give it a shot. It's really not bad! If you want to measure, that works too!
12a.) Working with right side of the fabric down, fold the long ends of your sleeve piece back 1/4". Press. Fold back another 1/4" and press so raw edges on the long side aren't visible. Sew. Repeat with other sleeve.
12b.) Flip over so right side is up. (From here on out, it's easier to work on both sleeves at the same time. Mirroring the side you're working on.) Fold one long side back about 1/4" or so. Press and sew smack dab on the folded edge. Repeat with other sleeve, only mirrored.
 |
| 12b |
 |
| Sewing down the very edge (ignore the two seam lines to the left. My machine messed up and I had to redo step 12a. |
12c.) With wrong side-down, fold material so it covers the edge line. Press. Repeat with other sleeve.
 |
| 12c |
12d.) With right sides still up, Flip the edge of the fabric up and press it so the fold will be the same width as the other. Stitch down the edge. Repeat with other sleeve.
 |
| 12d |
12e.) Just like Step 12c. Fold and press. Repeat with other sleeve.
 |
| 12e |
12f.) Repeat Step 12d.
 |
| 12f |
Step 12g.) Repeat 12e.
 |
| 12g |
12h.) Now you should have:
By hand, take the extra bit of fabric and semi-pleat it. Just fold it back and forth a few times, matching the folds on both sides. Pin in place.
Now, here's what I would have changed. after sewing the bottoms of the sleeves, as such:
 |
| Sewed sleeve. Pulled open. |
If I had the extra length in mine that I recommended in the beginning, I would now roll the raw edges up 1/4" and then another and sew in place. As it is, I had to overlock and make do. Phlppptt!
Step 13- Pin sleeves in place (side that is pleated on inside, loose part to the outside). Making sure the edges slightly pass 1/4" down onto the lining fabric. Starting on right side of lacy button thing, lift up the lace and stitch (backtack one or two at the beginning and end, but don't sew over embellishment), 1/4" away from ruffle, all the way around the bodice and ending back at the lacy button thing. When you hit the edges of the sleeves, backstitch over them, then forward stitch... continuing on your way.
 |
| Did not have sleeves pinned yet, was interrupted and forgot to take another picture. :) Your sleeves should be pinned on at this point. |
Step 14- Cut a 10.5" x 37" piece of your main fabric for the bottom dress piece and a 2.5" x 37" piece of trim. (Honestly, the 37" L was just because I wanted the pattern to line up. I would take the length anywhere up to 2x Measurement "A" and not worry about it bunching all funky.)
Fold your trim piece in half, wrong sides together and press. Then, place it right-side down and press the long edges 1/4" . Pin to dress piece, right sides together.
Sew 1/4" from raw edge.
Step 15- Fold right sides together and pin side seam all the way down, including the trim. Sew with a 1/2" seam allowance. Then overlock stitch.
Step 16- Fold trim under, pin in place and stitch around.
Step 17- Baste around raw top edge of the dress piece, pull string to gather. Spread gathers evenly and pin to bodice, right sides together. Sew 1/2" from top edge and then overlock stitch the raw edges.
Step 18- (Run a few test runs on a scrap piece of fabric if you've never done eyelets before.) If your eyelets are cured and dry, lay them on the bodice top and position them . Use your fabric pen to mark the center of the eyelet.
Punch through the hole using your eyelet plier.
Insert deep end of eyelet and push through hole.
Flip to inside and put shallow end of eyelet on. Squeeze pliers.
Repeat for the rest of your eyelets.
Step 19- Thread your ribbon through and seal the ends so they don't fray.
And you're done with that part!
The chiffon underskirt can be added to it for additional "oomph" if you want.... or it can be worn on its own. Tutorial for the chiffon skirt can be found
HERE.
Enjoy!